> ## Documentation Index
> Fetch the complete documentation index at: https://docs.mainly.ai/llms.txt
> Use this file to discover all available pages before exploring further.
# Writing, debugging and deploying webservices
> This guide teaches you how to use the server_http node to build a web service.
[View Project in Designer](https://platform.mainly.ai/designer/projects/31/graphs/236)
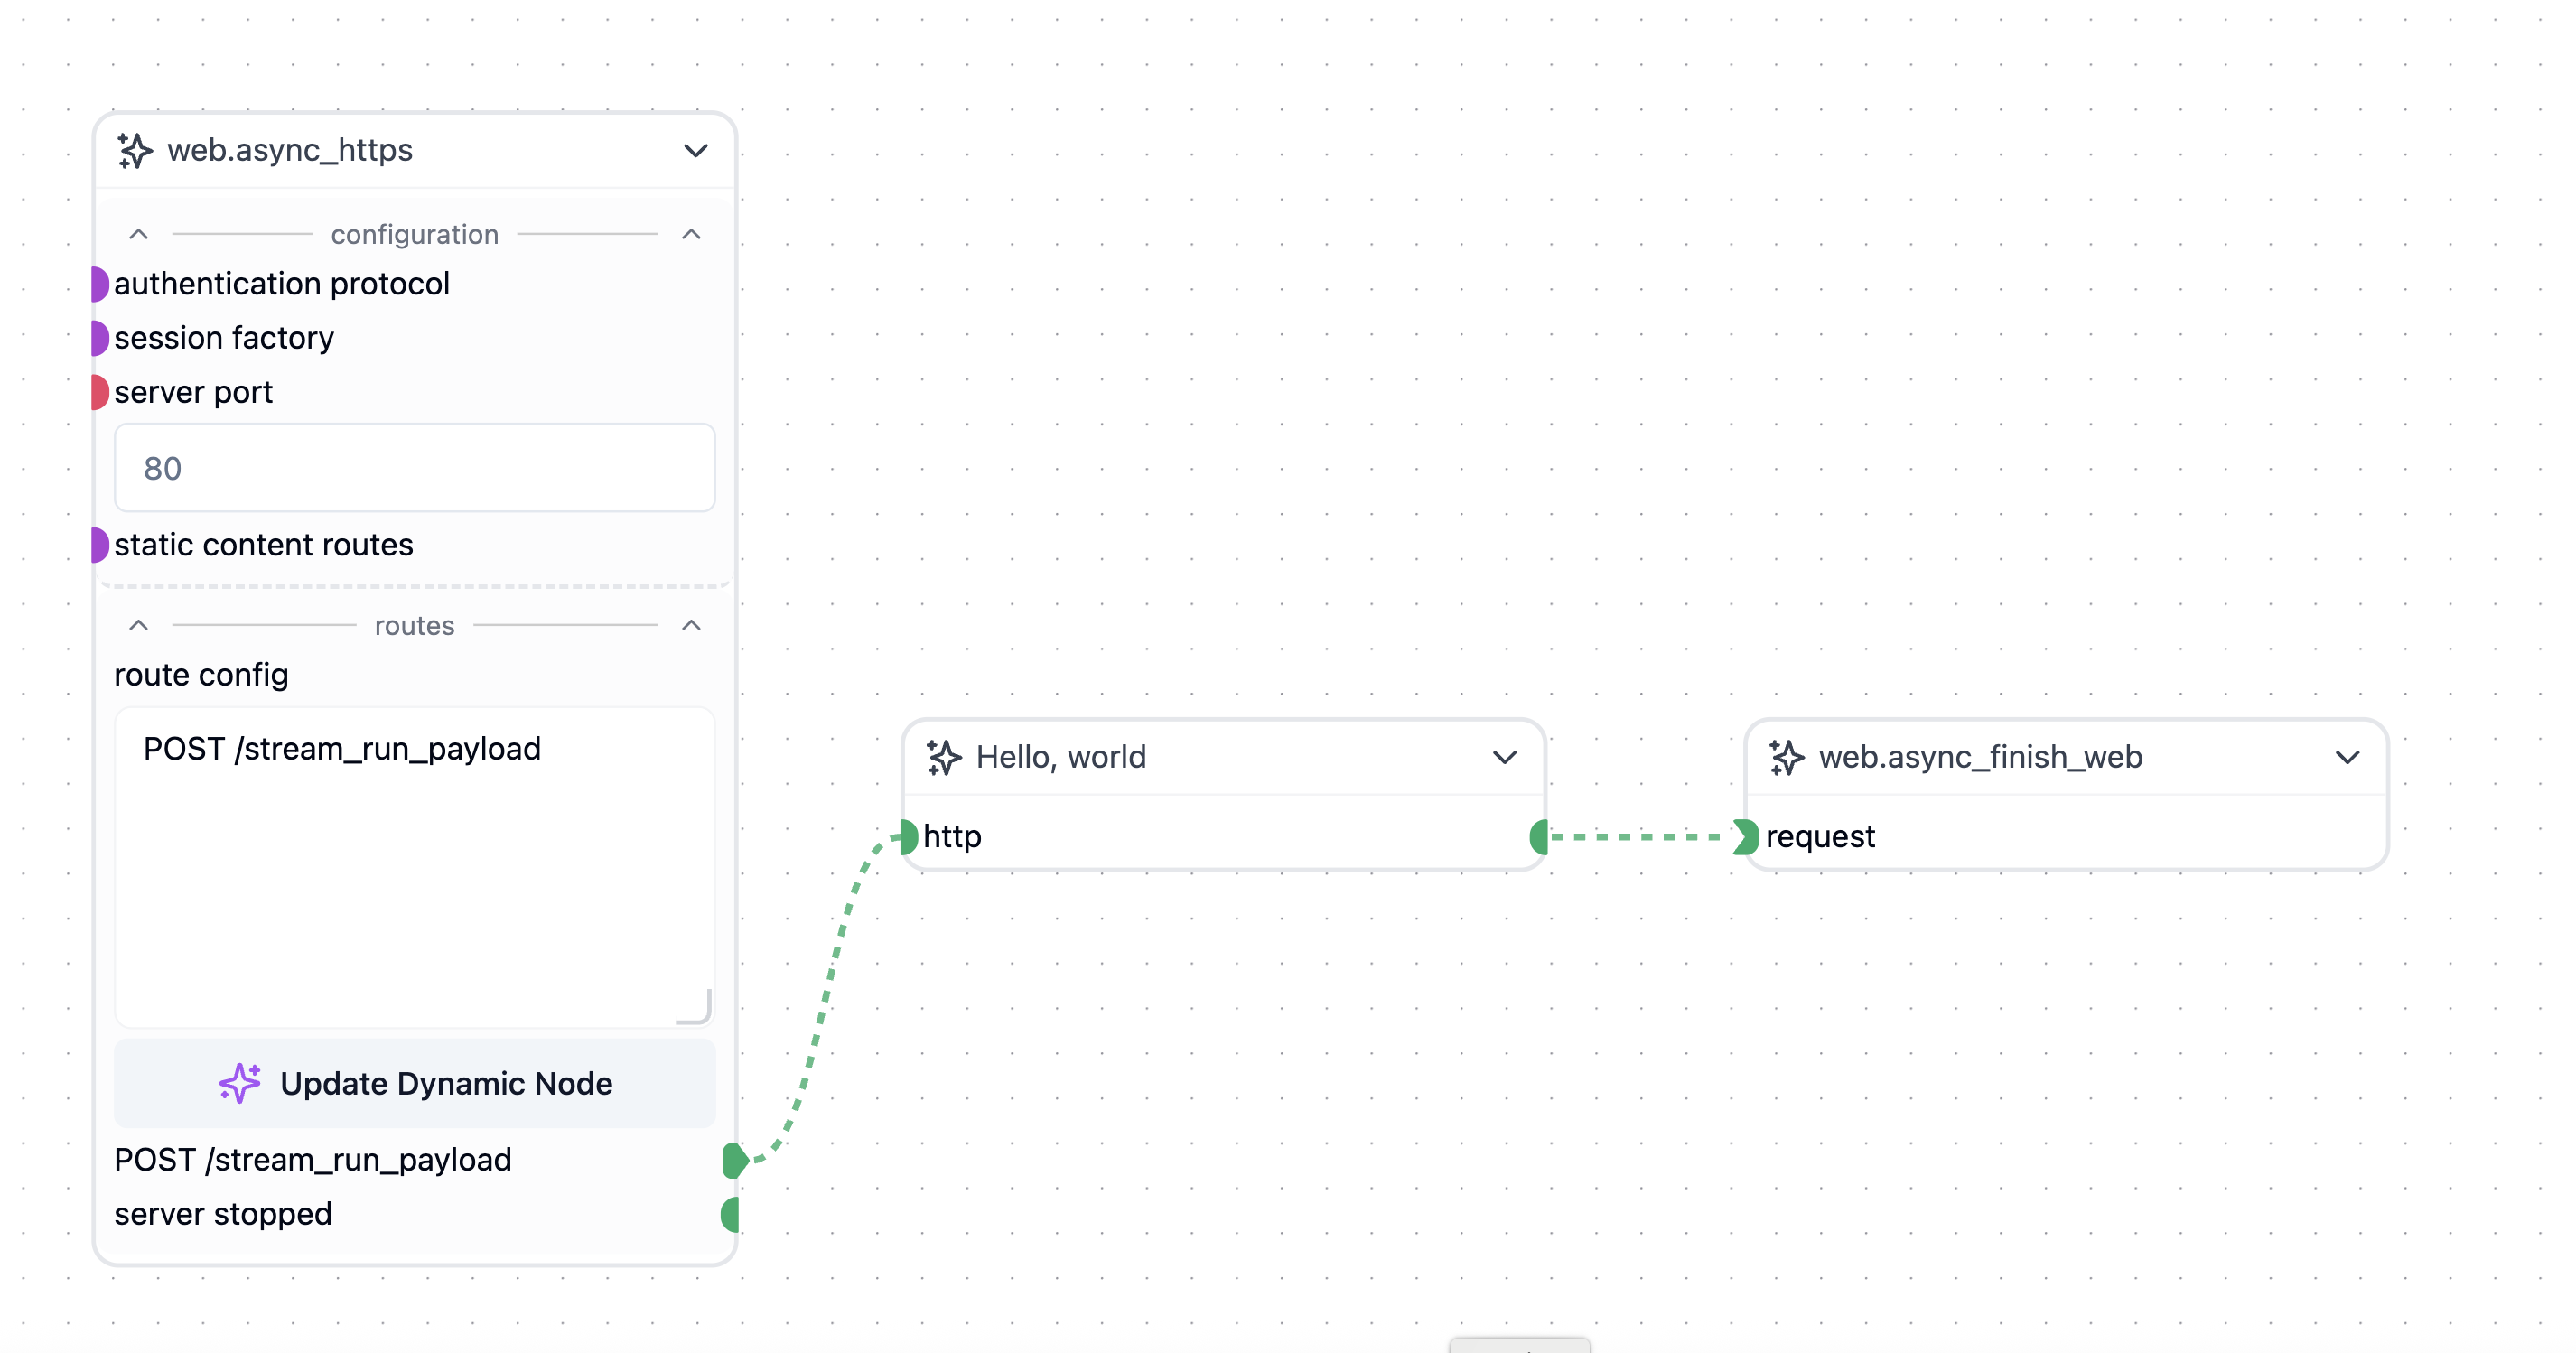 In this exercise, we will create a simple web service which streams data to the client. The projects main node is the `web.async_http` node which listens for incoming HTTP requests. It accepts an authentication node and needs to be terminated by a `web.async_finish_request` node.
Begin by dragging the following nodes onto the workspace:
* `web.async_http`
* `web.async_finish_request`
Then create a new node by right clicking on the workspace and selecting `Create Node`. This node will be used to generate the data that will be streamed to the client. Rename the new code and call it `Hello, world`.
Connect them according to the image below:
Right click on the `Hello, world`-node and commit the following code:
```python theme={null}
from mirmod import miranda
g_counter = 0
@wob.init()
def init(self):
self.http = None
wob.passthrough("state","http","http")
@wob.execute()
async def execute(self):
global g_counter
param = self.http.payload["prompt"] if "prompt" in self.http.payload else "no prompt given"
assert self.http != None
print ("g_counter= ", g_counter)
await self.http.event("data","{} {}".format( param, g_counter))
g_counter += 1
```
Click the run button on the right sidebar and the HTTP server will start listening on port 443 on the following address: `https://.p.mainly.cloud`
The `` you find if you click the job indocator in the top right of the workspace screen:
In this exercise, we will create a simple web service which streams data to the client. The projects main node is the `web.async_http` node which listens for incoming HTTP requests. It accepts an authentication node and needs to be terminated by a `web.async_finish_request` node.
Begin by dragging the following nodes onto the workspace:
* `web.async_http`
* `web.async_finish_request`
Then create a new node by right clicking on the workspace and selecting `Create Node`. This node will be used to generate the data that will be streamed to the client. Rename the new code and call it `Hello, world`.
Connect them according to the image below:
Right click on the `Hello, world`-node and commit the following code:
```python theme={null}
from mirmod import miranda
g_counter = 0
@wob.init()
def init(self):
self.http = None
wob.passthrough("state","http","http")
@wob.execute()
async def execute(self):
global g_counter
param = self.http.payload["prompt"] if "prompt" in self.http.payload else "no prompt given"
assert self.http != None
print ("g_counter= ", g_counter)
await self.http.event("data","{} {}".format( param, g_counter))
g_counter += 1
```
Click the run button on the right sidebar and the HTTP server will start listening on port 443 on the following address: `https://.p.mainly.cloud`
The `` you find if you click the job indocator in the top right of the workspace screen:
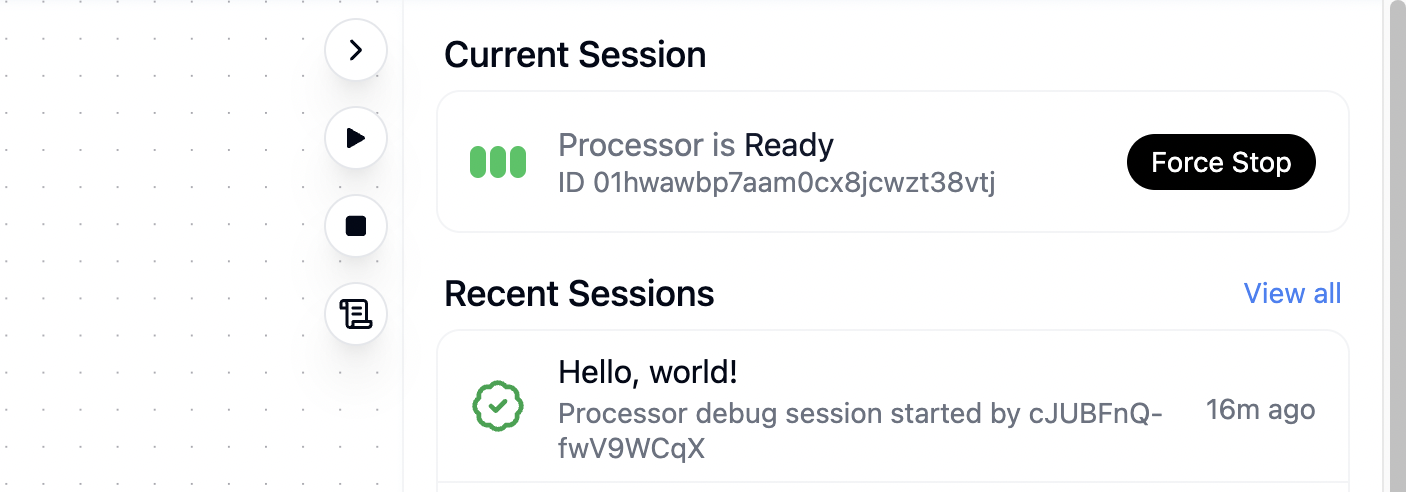 Here we see that the ID is 01hwawbp7aam0cx8jcwzt38vtj and if we go to [https://01hwawbp7aam0cx8jcwzt38vtj.p.mainly.cloud/docs](https://01hwawbp7aam0cx8jcwzt38vtj.p.mainly.cloud/docs) we can verify that the service is running. Next we need to write the client code. For this we need Visual Studio code or similar and an installed python environment on our desktop.
This is the client code we're going to use:
```python theme={null}
import requests
def prompt_mainly(endpoint, prompt):
url = f"https://01hwawbp7aam0cx8jcwzt38vtj.p.mainly.cloud/{endpoint}"
payload = { "prompt": prompt }
resp = requests.post(url, json=payload, stream=True)
d= ""
for r in resp:
d += r.decode("utf8")
print (d)
```
We call the function like this:
```python theme={null}
prompt_mainly("stream_run_payload","Hello, world")
```
We should expect to see the following output:
```
event: data
data: "Hello, world 0"
```
Here we see that the ID is 01hwawbp7aam0cx8jcwzt38vtj and if we go to [https://01hwawbp7aam0cx8jcwzt38vtj.p.mainly.cloud/docs](https://01hwawbp7aam0cx8jcwzt38vtj.p.mainly.cloud/docs) we can verify that the service is running. Next we need to write the client code. For this we need Visual Studio code or similar and an installed python environment on our desktop.
This is the client code we're going to use:
```python theme={null}
import requests
def prompt_mainly(endpoint, prompt):
url = f"https://01hwawbp7aam0cx8jcwzt38vtj.p.mainly.cloud/{endpoint}"
payload = { "prompt": prompt }
resp = requests.post(url, json=payload, stream=True)
d= ""
for r in resp:
d += r.decode("utf8")
print (d)
```
We call the function like this:
```python theme={null}
prompt_mainly("stream_run_payload","Hello, world")
```
We should expect to see the following output:
```
event: data
data: "Hello, world 0"
```